
 by
by In this tutorial, I will teach you how to generate your class diagram in Visual Studio. This is very interesting because I normally use Microsoft Visio or some other designer to manually draw class diagrams in the past. And the more interesting thing is that this diagram is in sync with your database design.
To generate the class diagram in Visual Studio, follow the steps below:
Step 1: Open Visual Studio
Step 2: Open the Solution we created in the previous tutorial. You can create a new Solution if you did not follow the previous tutorial.
Step 3: In the Solution Explorer, right-click on your project and select Add > New Item to open the New Item dialog.
Under Visual C#, select Data as shown in Figure 1
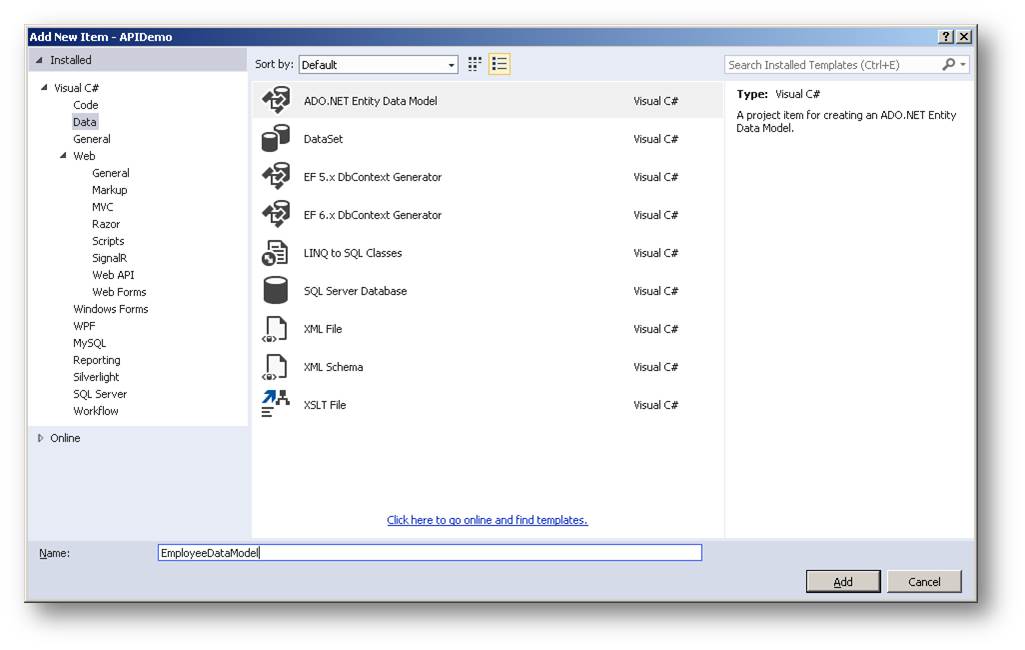
Step 4: In the list of items, select ADO.NET Entity Data Model
Step 5: Give it a name like EmployeeDataModel.
Step 6: Click Add to display the Entity Data Model wizard as shown in Figure 2

Step 7: Make sure that ‘EF Designer from database‘ is selected
Step 8: Click on Next. The next Wizard Step is displayed as shown in Figure 3
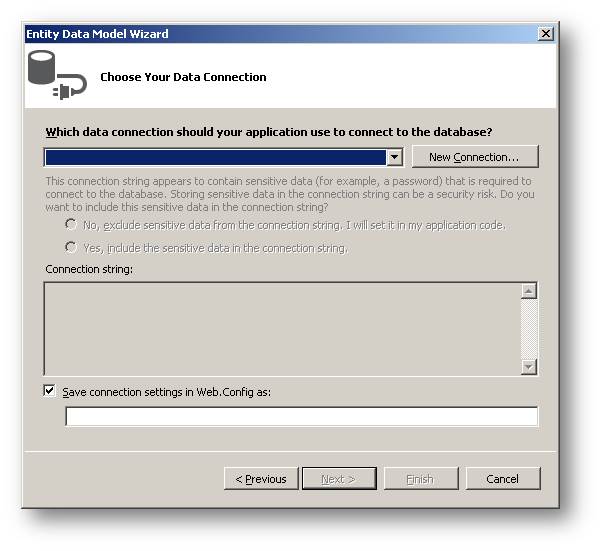
Define Database Connection Parameters
Now we need to connect to the database we created by specifying the name of the server, the instance and the name of the database.
Step 9: Click on New Connection to display the Connection Properties dialog
In the Connection Properties dialog box that appears, enter the Connection Properties as shown in Figure 4
Step 10: Enter the Server Name
Step 11: Select the name of the database you created under Select or enter database name
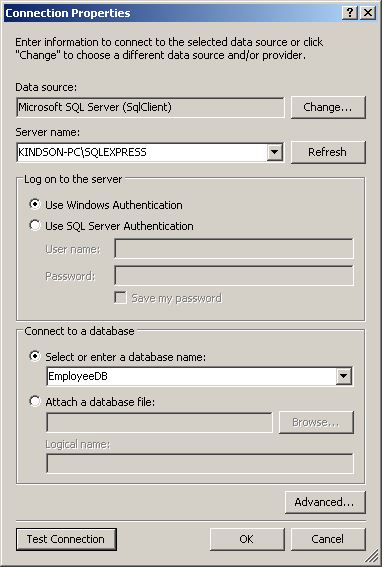
You could also Click on Test Connection to ensure that the connection succeeds.
Step 12: Click on Ok to get back to the Data Model Wizard. A dialog box appears prompting you to select an Entity Framework.
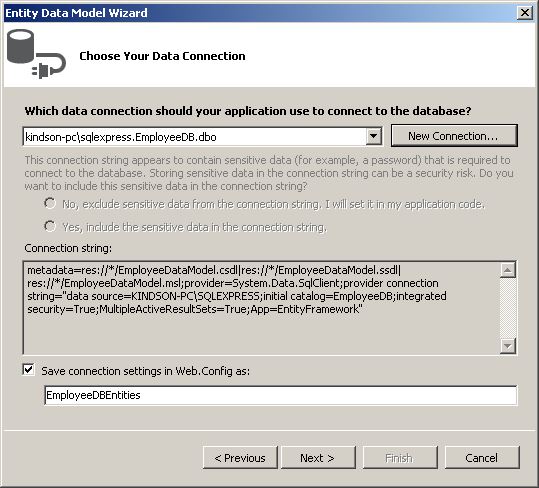
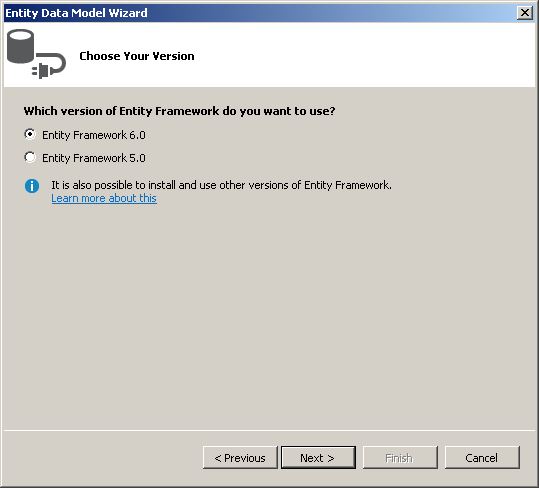
Step 13: Select Entity Framework 6.0. Other versions would also work
Step 14: Click on Next
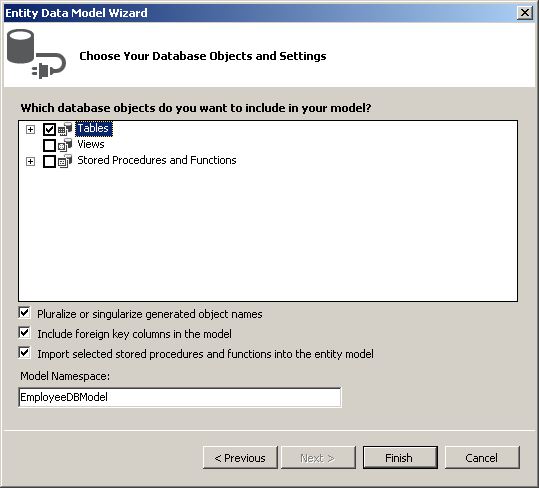
Step 15: Select the checkbox for Tables (We discuss Views and Stored Procedures in subsequent lessons)
Step 16: Click Finish to complete the task
After a few seconds, the Class diagram is generated as you can see in Figure 8. Isn’t this amazing!

Notes About This Class Diagram
Notice that there is a fifth object in the diagram with a name of sysdiagram. Delete it.
You can also see that this diagram resembles the relationship diagram we created in Tutorial 5, with the relationships labelled.
Each of the classes is has two sections
- Properties: This corresponds to the fields of the particular table in the dabase
- Navigation Properties: This is additional information that could be selected along with the given record. For instance, for an Employee, we need to select his address, country and department. Note that they have singular name. In other tables like Departments, the navigation properties specifies the Employees that belong to a particular department. Also note that the navigation property here is plural reflecting the one-to-many relationship(one department to many employees). This would become clearer as we progress
Final Notes
Now that we have completed developing the data tier of our REST API application, we are now ready to go back to continue working on the main REST API files.
In the next tutorial, we would use REST request to perform GET, PUT, POST and DELETE operations on the actual data on the database.
For now I would like to thank you for your efforts! You are doing great!
Remember to leave a comment if you have any challenge following this tutorial.

I see you don’t monetize kindsonthegenius.com, don’t waste your traffic, you can earn additional cash every month with new
monetization method. This is the best adsense alternative for any type of website (they approve all sites),
for more info simply search in gooogle: murgrabia’s tools