 by
by Java Programming Tutorials for Beginners, Lesson 1: Introduction to Java
So lets get started!
Step 1: Open Netbeans (This is actually the last step of Lesson 1)
 |
| The Netbeans Window |
Step 2: Click on File and Select “New Project”. You would see the window below
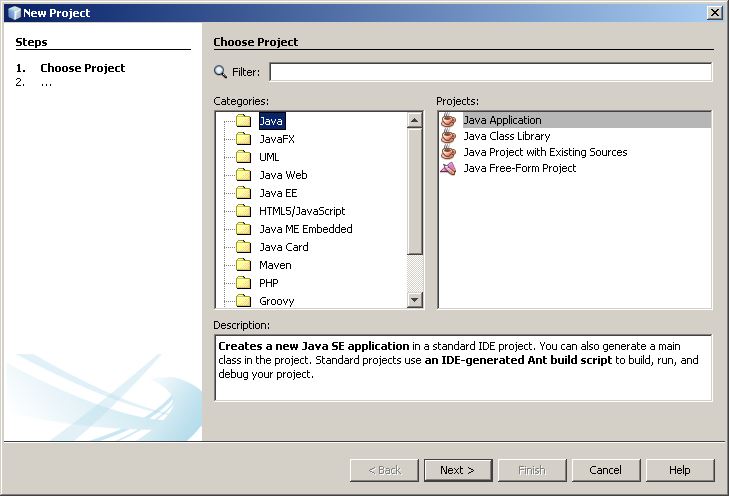
Under Categories, make sure Java is selected and under Projects: make sure Java Application is selected exactly as is shown.
Step 3: Click on Next. The window below appears
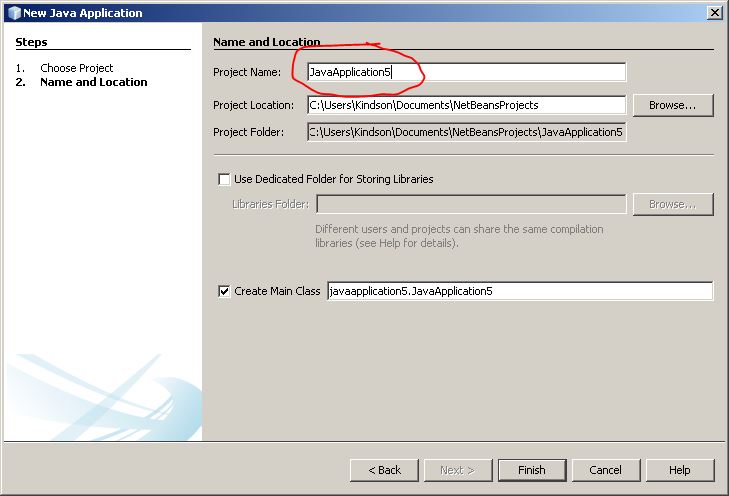
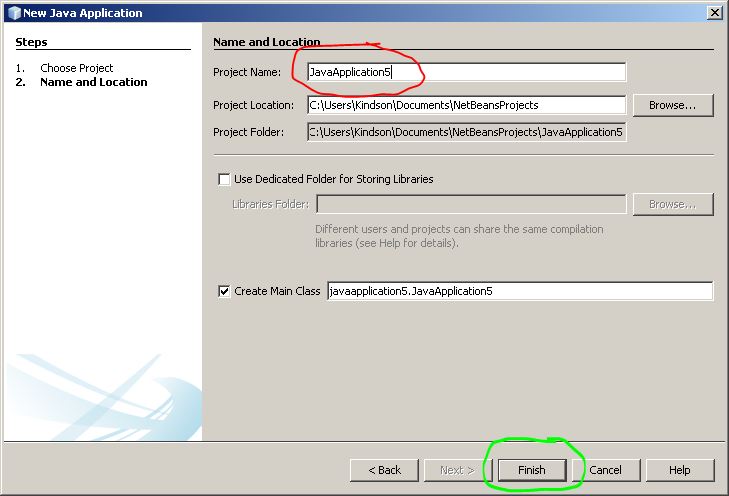
Step 4: In the Project Name box, delete what is there and write: MyFirstProgram (don’t give spaces). Then you can click on Finish
If you have done everything correctly, the Java File opens where you can start writing programs. This is shown below.
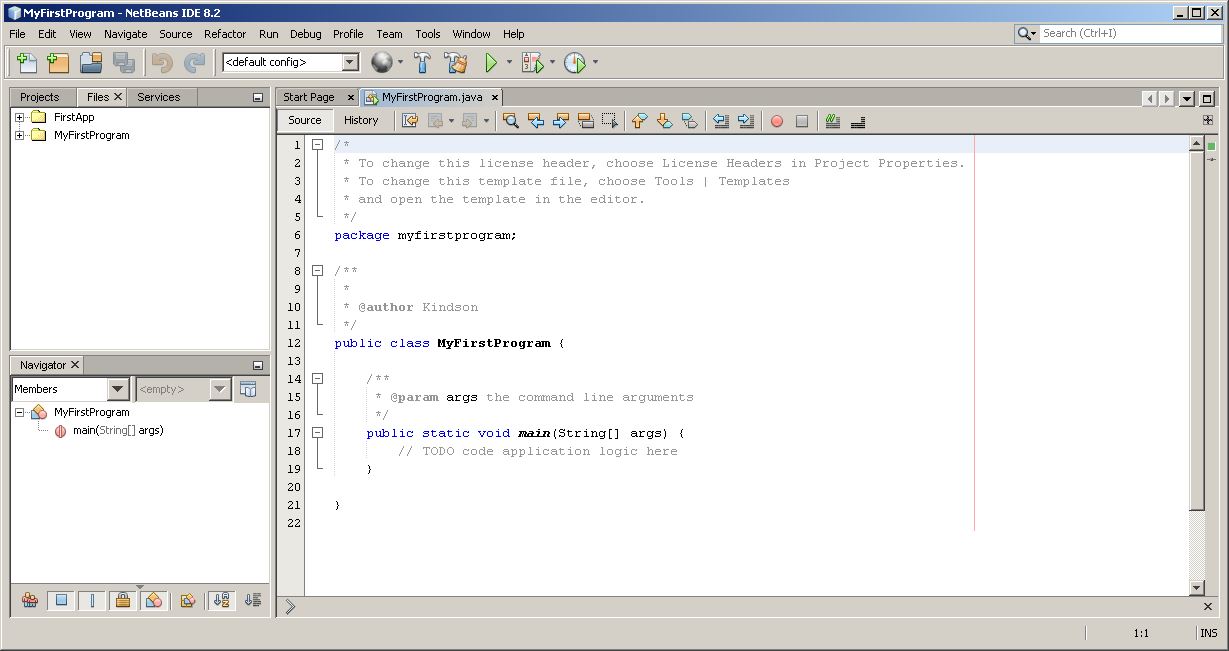
Step 5: Take some time to observe the parts I labelled 1 – 6 as you can see in the screen below.

1. MyFirstProgram.java – This is the name of the file that you are currently looking at. Remember that Java file have the extension of .java.</div>
2. File Tab – Where you can see two folders. The Second folder is yours, Netbeans keeps all your file in this folder. Later, we would discuss the content.
3. Navigator Tab – Shows you the classes and functions in your program(don’t worry about these, we would discuss them later)
4. This section is where you actually write your program. So we would start writting program under the text that begins with // TODO…
5. The name of the package. This is same name as the folder name in the Files tab. The package contains all your files.
6. The name of the Function. Every java program must have this Function called main.
Now on to Step 6.
Step 6: In Section 6 under the part that says //TODO….
Type the following line of code(don’t copy and paste, type it)
System.out.println(“This is my First Program”);
As you are typing, some pop-ups may appear, ignore them and just type exactly as you see here

Step 7: Run The Program by clicking on the Run button. The Run Button is highlighted in Red. It it a green play button.


When are you publishing lesson 3???
Really? Thanks for mentioning it! I’ll review and update it.
[…] 5, 2017 | 1 Comment This lesson follows from the Lesson 2 of the Java Programming Tutorial for Beginners. So if you have not gone through Lesson 1 and Lesson […]
[…] java basic syntax. In Tutorials 1 we installed NetBeans which is the compiler you will be using. In Tutorial 2, we wrote our first […]
[…] Java Programming for Beginners – Lesson 2: Write Your First Program […]
[…] If you have gotten to this point, then know that you have successfully completed Lesson 1 of the Java Programming for Beginners Tutorial. You are now ready for the Lesson 2 which I would publish in the next two days. For now let’s wait for everyone to complete this lesson. If you have any issue with this installation, please let me know in the comment box below. Just to add to your knowledge: JDK: Java Development Kit IDE: Integrated Development Environment OOP: Object Oriented Programming. Also make sure you know the 10 Basic Rules of Computer Programming Watch the Video Here Continue to Lesson 2, Your First Java Program […]